In 2013, Apple introduced support for AVB on their Macs. This was a pretty major move, allowing Apple Mac users to connect AVB enabled audio devices to their system via a virtual AVB entity (Your Mac). The only down side was the user experience wasn’t and still isn’t the easiest to get up and running. This is one of the few frontiers left in audio visual land and getting setup with this can be quite a daunting task.
In this article, I’ll be walking through adding your first AVB audio device into your Mac’s AVB configuration, as well as running through a few tips and tricks along the way. But first, let’s go through a few bits of housekeeping.
Connecting AVB Devices to your Mac
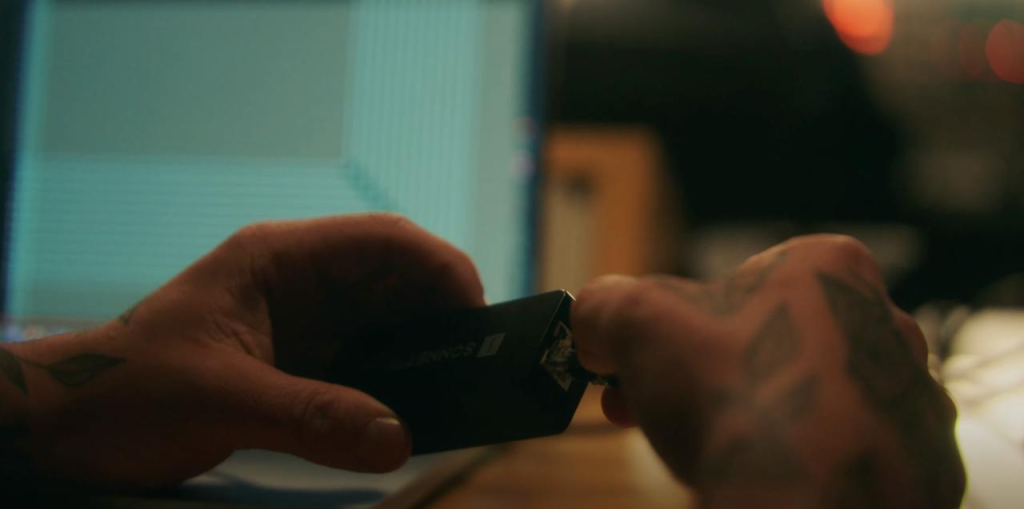
AVB on mac requires an AVB endpoint (an AVB device connected to the mac via ethernet). As well as specific AVB enabled ethernet ports or adapters. Apple AVB requires a thunderbolt enabled ethernet port to communicate with other AVB devices. This is fine on machines like the Mac Pro or Mac Studio which have built-in thunderbolt ethernet ports, however if using a Mac with no ethernet port like a MacBook Pro or if your ethernet port is in use for your broadband connection, you will require an AVB compliant ethernet to thunderbolt adapter. This isn’t your standard ethernet adapter, USB-C adapters won’t work and you’ll require a specific AVB enabled ethernet to thunderbolt adapter such as the Sonnet adapters, they’re more expensive than standard ethernet to USB-C adapters but are crucial for connecting AVB endpoints to Mac machines without built-in ethernet ports.
Adding in your first AVB device & navigating the ATDECC Controller
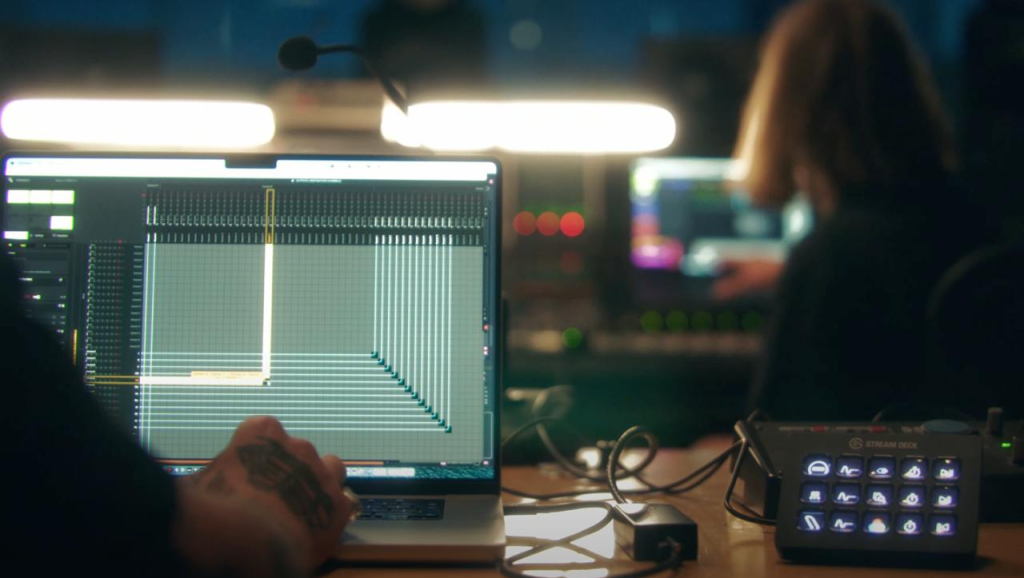
So. Let’s get into it. I’ll connect my 12 mic to my mac via ethernet to a Sonnet AVB to thunderbolt adapter which is plugged into one of my thunderbolt 4 ports. However, as I mentioned earlier, it’s not going to show up in my core audio device list just yet. We’ll need to configure the AVB device in Audio MIDI setups ATDECC controller first.
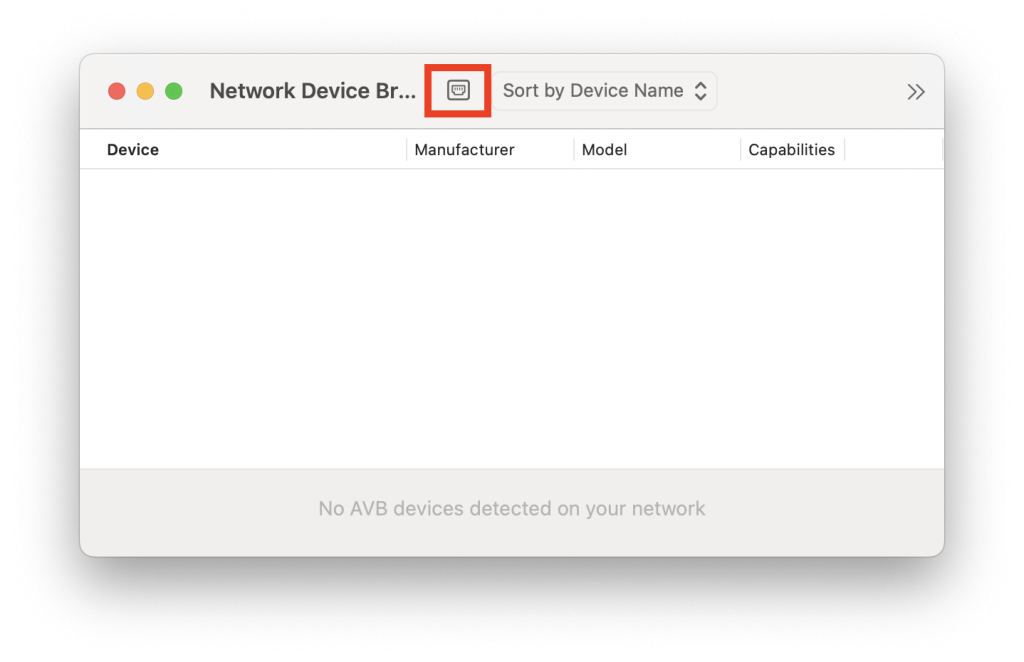
Firstly, you’ll need to find the ATDECC controller, this can be found in Audio MIDI Setup. When you open the app, head to ‘Window’ and click on ‘Show network device browser.’
From here you’ll need to head into the AVB audio entity configurator which you can find by clicking on the ethernet port button.
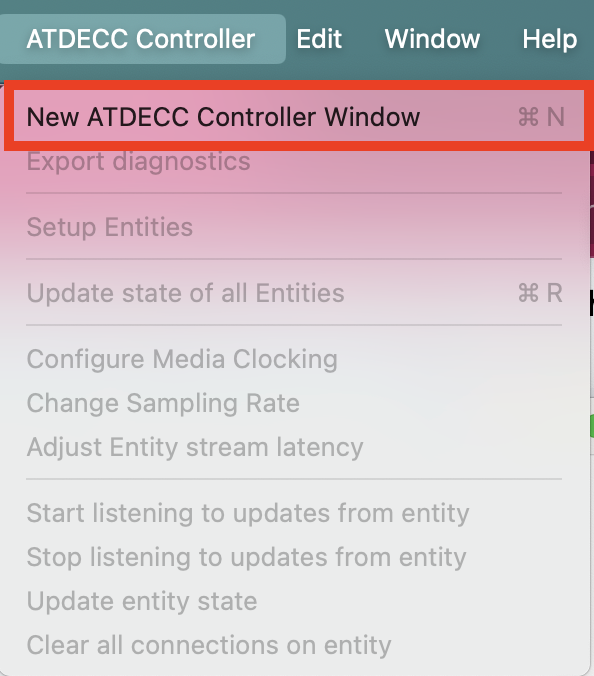
Lastly, navigate to the ATDECC controller in the header and click on ‘new ATDECC controller window’.
This is going to open up the window where you can manage your AVB entities connected to each network port on your Mac.
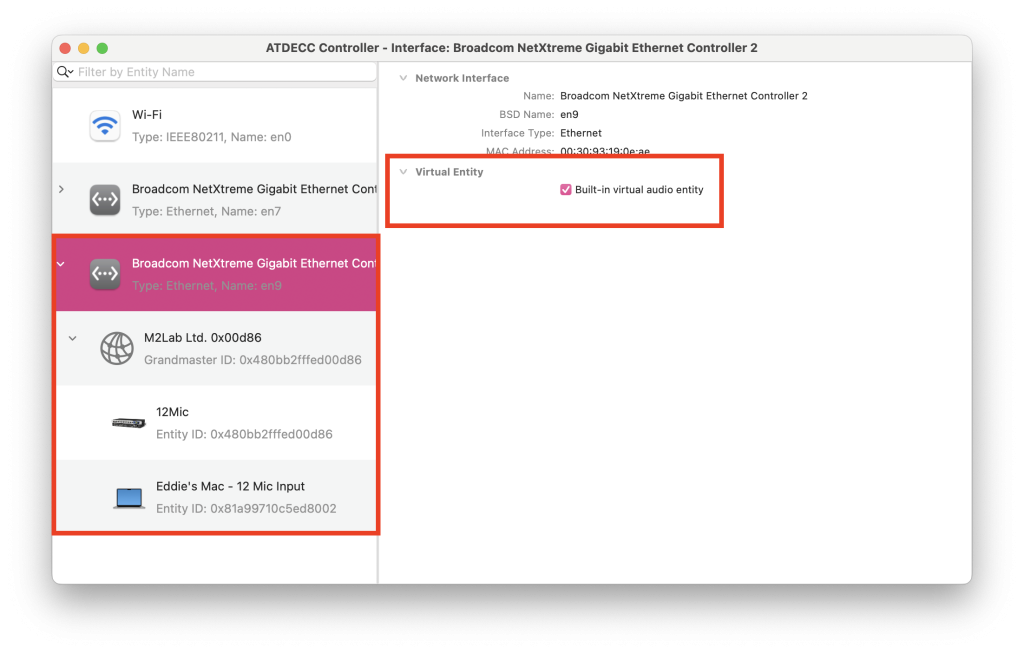
Firstly, in the ATDECC controller, you’ll need to select the AVB adapter or network port/interface your AVB device is connected to, select it and the first thing you’ll want to do is enable the ‘Built-in virtual audio entity’ Enabling the Virtual Entity Mode will allow your Mac to operate as an AVB Device compatible with essentially any AVB device connected to your machine that supports the same stream formats as Apple’s virtual entity. This includes IRC, AAF etc.
Once enabled, you’ll be able to see the AVB entities available on the selected network interface (AVB adapter or port). You can see in the above image I have my Mac which I have given a custom name to, and my RME 12 mic. Above the available entities you will see the Grandmaster, this is essentially the main AVB routing manager for your Macs AVB network. We’ll come back to this once we have configured the two AVB entities we wish to connect.
Let’s start off with configuring our Mac’s virtual AVB entity.
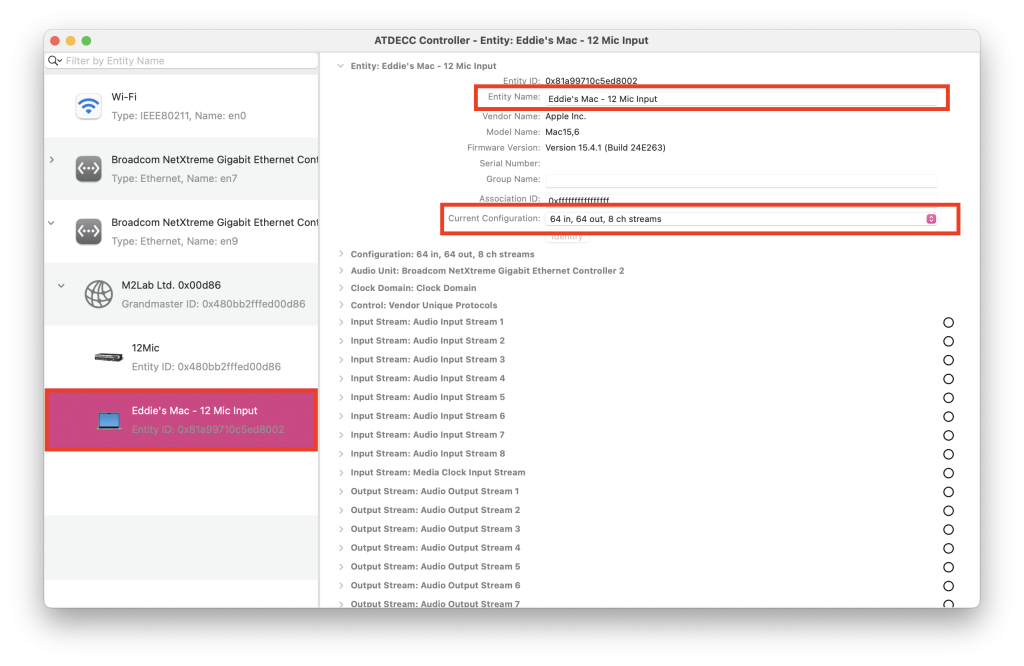
Here we can see quite a substantial amount of dropdowns. The first thing I’ve done is given the entity name a custom name. This is going to help out with navigating devices later. When we’re finished with the configuration down the line, this entity will appear as a core audio device in my Mac with the entity’s name. I’ve also edited the current configuration to be 64 channels with 8 AVB streams, this is currently the maximum channel count for Apple’s AVB entity configurator, however, Apple are constantly improving their AVB support, hopefully one day we’ll get to 128 or hell, 256, but for now, 64 channels is more than enough.
Once the name and channels are configured we can move onto the I/O stream formats of both devices.
We essentially need to match the input and output stream formats for both devices before we can connect the two devices together to allow the AVB entity to be visible as a core audio device. This will require a bit of back and forth between both AVB entities in the ATDECC controller to see which stream formats both entities support.
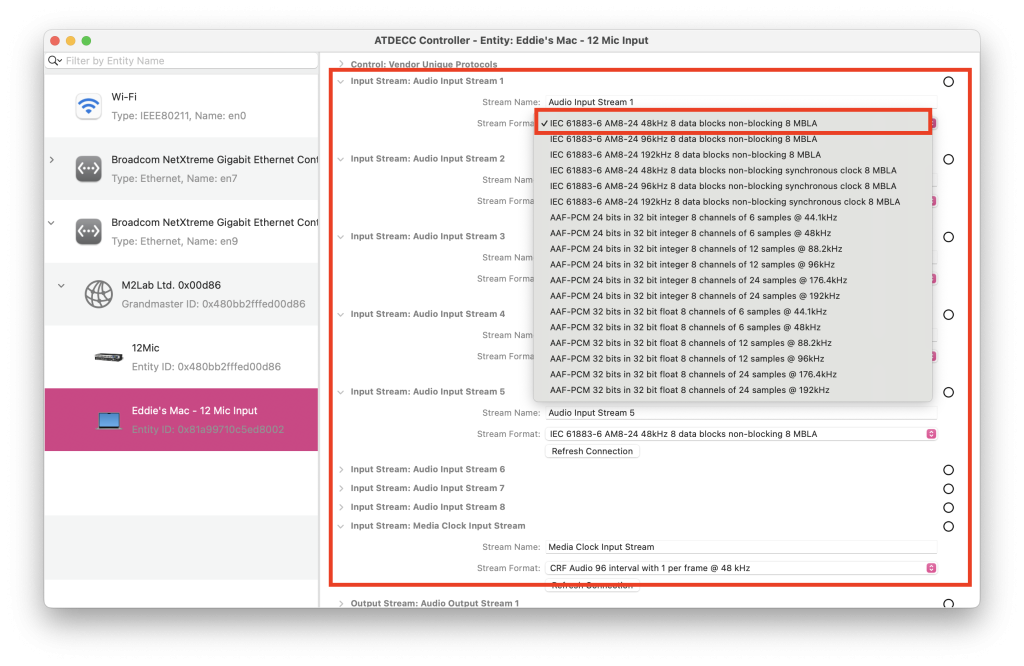
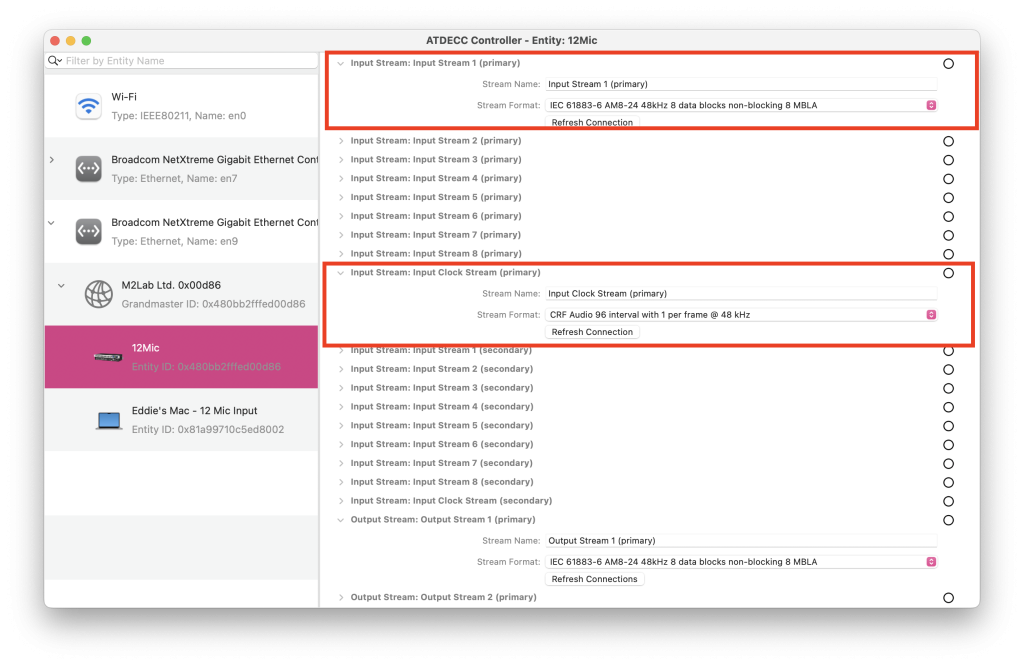
For the audio input and output streams of my Mac’s AVB entity I have used the format ‘IEC 61883-6 AMB-24 48kHz data blocks non-blocking 8 MBLA’, that was a mouthful!
I’ve used this format just as an example, it’s completely up to you and will be dependent on the sample rate of your machine and preferred format. I always operate at 48kHz however, if I were to move up to 96kHz or down from 48kHz, I would need to amend the stream format here for both devices to be at the correct sample rate to avoid any additional latency from any sample rate conversion down the line in OMNIBUS.
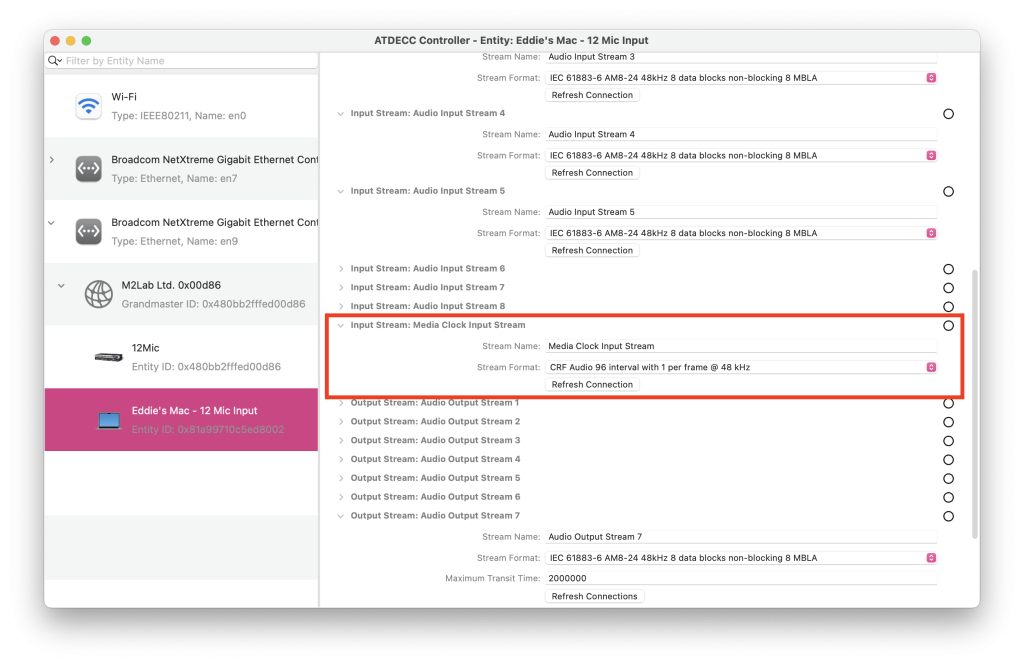
Now one of the most important parts here is to make sure that both devices also have a matching media clock input and output format, if not, there will be no way for the two AVB entities to communicate. We’re somewhat limited here as the only media clock stream format my Mac and 12 mic are compatible with is CRF. I have selected ‘CRF Audio 96 interval with 1 per frame @ 48kHz’. Other devices may have more clock formats in common.
Let’s now take a look at the 12 mic. We’ll need to make sure both entities have matching input, output and clock stream formats.
Now we have all our audio input, output and clock streams using the same stream format, we can move onto the second to last step, which is the grandmaster AVB routing. This page is also useful to see whether you have matched all the I/O and clock streams to the same format.
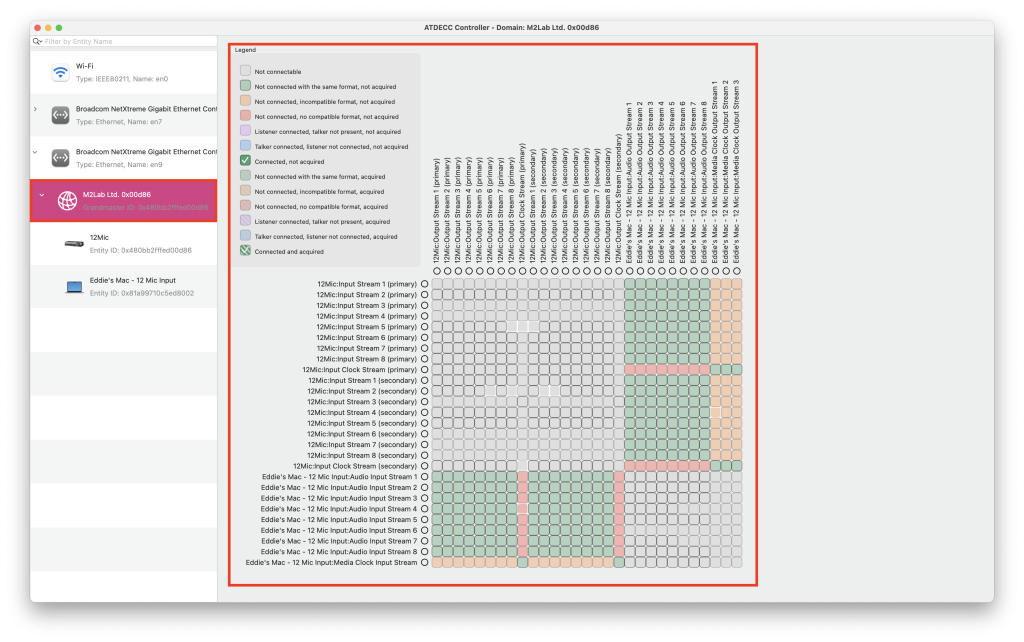
This window is essentially your Mac’s AVB entity routing matrix, this is where you are able to route and combine multiple AVB devices together to communicate with your Mac.
You’ll see that the cells which corroborate my 12 mic and Mac’s inputs, outputs and media clocks are green, meaning the formats match. As they’re green, I can start connecting the AVB streams of both devices together.
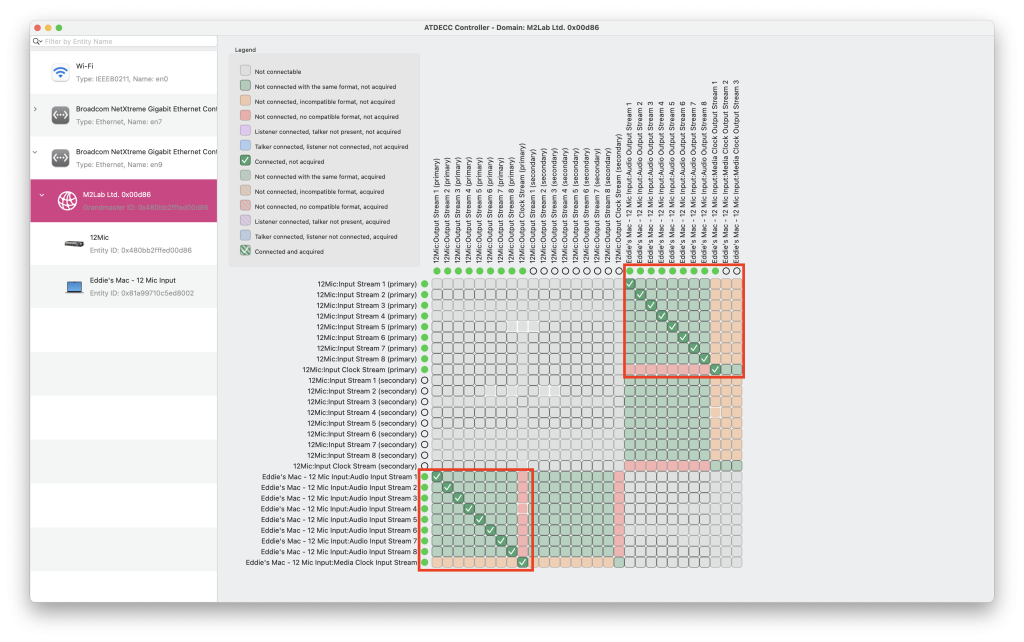
I’ve made sure to connect the corresponding input, output and clock streams from the 12 mic to my Mac’s AVB entity. Now this is all connected, we can head back to Audio MIDI setup and voila – you’ll now see my Mac’s AVB entity is available as a core audio device. As we’ve linked up the I/O and clock streams together, anything that is entering my 12 mic will appear as an input in my 12 mic, alternatively, any audio travelling to the outputs of my Mac’s AVB entity device, will then travel to my 12 mic’s outputs.
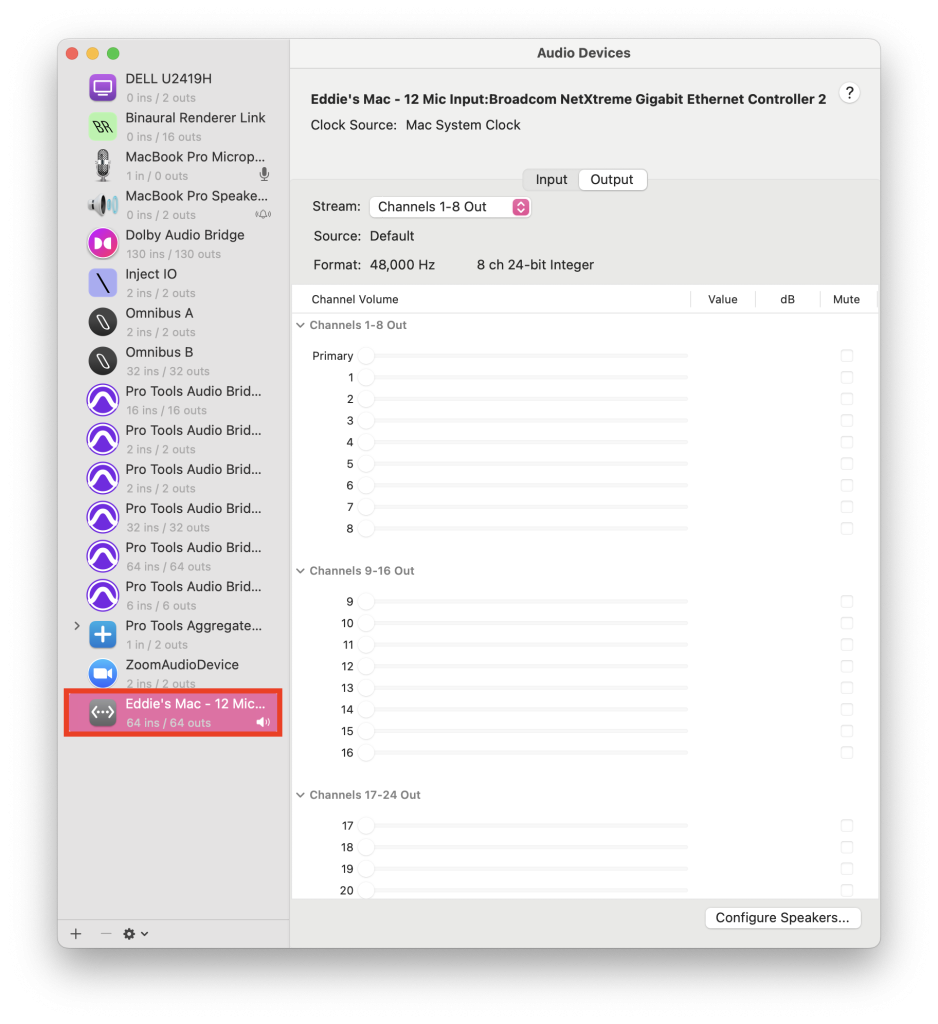
As this is now available as a core audio device, it means I will be able to add it into OMNIBUS and from there, combine it into my studio’s OMNIBUS configuration.
This is fairly straightforward, firstly, I’ll add the device into my routing matrix from the device list, once it’s in my matrix I just need to route my inputs and outputs together.
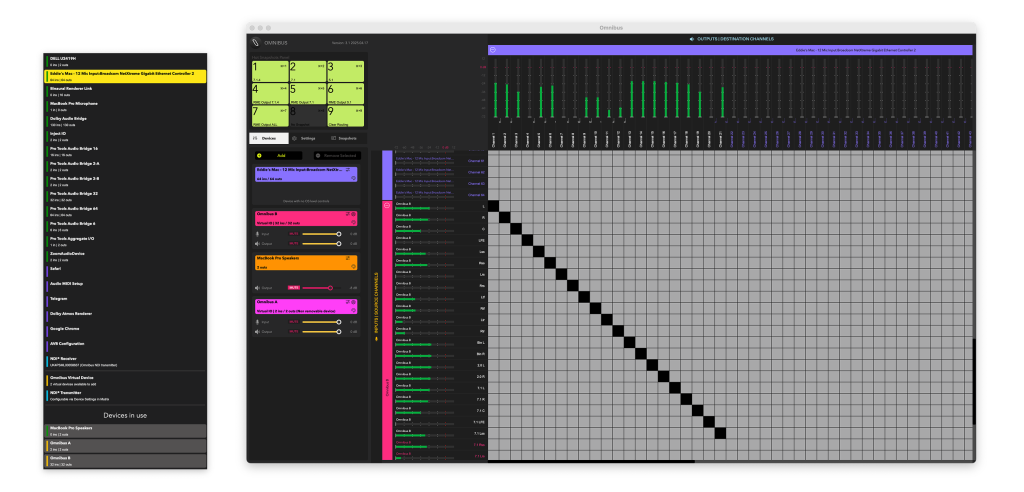
Now that I’m all set up with the above steps, I’m now able to add this AVB device into my OMNIBUS configuration and run the 12 mic in conjunction with my other interfaces and devices.
This doesn’t have to be with a 12 mic, these steps should apply to any other AVB device as long as the I/O and clock formats match your Mac’s AVB entity.
You can try OMNIBUS for free now and get a 30-day demo on us.